Our Top 6 Dutch-Style Cocoas for Brownies, Hot Chocolate, and More

Our Top 6 Dutch-Style Cocoas for Brownies, Hot Chocolate, and More

Dutch-style cocoas are alkaline and dark, with a flavor that's earthy and deep. These six brands are guaranteed to please.
Nu Naturals, Cacoa Barry, Callebaut, Bensdorp, Droste, Valrhona
[Photographs: Vicky Wasik]

More

All About Chocolate
Everything you want to know about chocolate
Those who've sampled their way through the chocolate desserts in my cookbook or here on Serious Eats may have noticed a trend—my recipes almost universally call for Dutch-process cocoa powder.
To fully appreciate the why, it's important to understand what cocoa powder is: the mass of dry matter left behind after the oily cocoa butter is extracted from cocoa beans that have been fermented and roasted for maximum flavor. This powder is naturally acidic. Natural cocoa powder is sold as is, while Dutched cocoas include an additional step to neutralize that acidity (a process developed by a Dutch chemist, hence the name).
Cocoas within each style can vary wildly in flavor depending on the type of cocoa bean used, where it was grown, its quality, how long it was fermented, how darkly it was roasted, and how much of its fat was removed (and, in Dutch styles, the specific degree of alkalization). That means that the flavor, color, fat content, and pH of any cocoa powder will vary from brand to brand and style to style.
Collage of five natural cocoa powders and one low-fat powder for comparison
An assortment of natural cocoas.
Broadly speaking, the natural cocoas sold in American supermarkets tend to come from mediocre cocoa beans that have had almost all of their cocoa butter removed, resulting in a light-red powder that's starchy and low in fat—about as rich and luxurious as a handful of chalk. The acidity often has a tinny quality, rather than one that's zippy and bright.
An assortment of Dutch cocoa powders spread out on a metal surface
An assortment of Dutch cocoas.
But because Dutch-style cocoa is perceived as a specialty product that can be sold at a higher price, most Dutch-cocoa brands contain nearly twice the fat of natural styles, and often come from better-quality beans. The result is a slightly alkaline cocoa powder that's higher in fat, lower in starch, and more aromatic all around, with a mahogany color and a flavor profile that emphasizes cocoa's darker, nuttier, earthier tones.
Overhead close-up of the crackly, dark-brown surface of brownies
In the past, calling for Dutch cocoa was my way of nudging bakers toward higher-quality ingredients, ensuring that brownies and cakes bake up moist and rich, loaded with cocoa butter and a deep chocolate flavor. But that's not to say all Dutch cocoas are equally rich and delicious, or that all natural styles are low-fat and bland.
Search around online, and you'll find plenty of natural cocoas that retain a higher proportion of cocoa butter and come from top-quality beans with a beautifully bright acidity. I included five of them in an overview of my favorite natural cocoas.
Overhead shot of six bowls containing ingredients for homemade brownie mix, each with a different variety of Dutch cocoa
Likewise, there are crappy Dutch cocoas out there, made from low-quality beans that have been squeezed dry to remove every last drop of cocoa butter, then alkalized to the point of tasting more like ash than chocolate. Others still may be only half alkalized, which can throw off the chemistry of a recipe that was developed for a true Dutch cocoa.
So here's a collection of Dutch cocoas that I can personally vouch for, all of them road-tested in my homemade brownie mix to show off their differences in flavor, color, and richness. Note that you can often save money by buying in bulk—like any cocoa, Dutch styles are shelf-stable and can generally be kept for years, as long as they're protected from sunlight in an airtight container at cool room temperature. When in doubt, consult the expiration date from the manufacturer; it will generally be a year or two from the date of purchase.
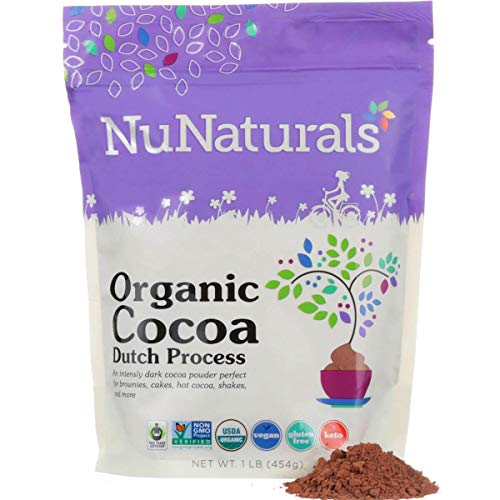
Nu Naturals

Nu Naturals Organic Cocoa, Dutch Process
This fair-trade Dutch cocoa falls into the range of 22 to 24% cocoa butter, which is more than twice the fat of most supermarket offerings. While it has a deep chocolate flavor, it isn't as earthy as other brands, allowing some of the cocoa's fruitiness to pull through.
In brownies, it baked up unexpectedly dark, given its comparatively light color. The taste-testers at Serious Eats found these brownies to be the chewiest of the lot, perhaps owing to the cocoa's particular balance of fat, starch, and pH. At 87 cents per ounce, it's a great value for any baker looking for a multipurpose Dutch cocoa that won't break the bank.

Cacao Barry Extra Brute

Cacao Barry Extra Brute cocoa powder
Another Dutch cocoa in the 22-to-24% range, Cacao Barry Extra Brute is rich and aromatic. The company sources its beans from countries in West Africa and uses a fermentation and drying process that adds to the complexity of flavor.
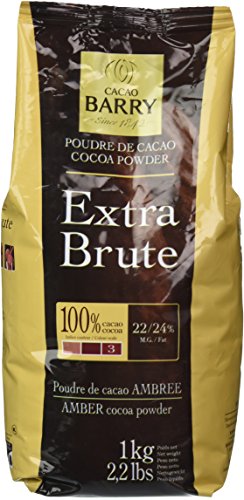
This brand has been my personal go-to for years; its deep color and richness lend a dark chocolate punch to any recipe. It's sold in larger packages than many other brands, exemplifying the value of bulk purchasing at just 56 cents an ounce.

Callebaut CP777

Callebaut CP777 Cocoa Powder
Made with a blend of beans from West Africa, as well as from Central and South America, Callebaut's CP777 has a well-rounded chocolate flavor that's classic but complex.
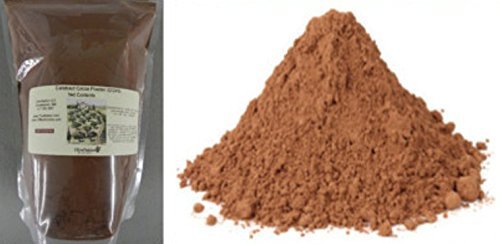
At nearly $1.20 an ounce, it's on the pricier end, so consider it something of a special-occasion splurge. While its fat content likewise falls between 22 and 24%, it made brownies that seemed particularly gooey and rich, so we suspect it's on the higher end of that spectrum.

Bensdorp Royal Dutch

Bensdorp Dutch-process cocoa
Bensdorp is a Dutch chocolate company with a 175-year-old tradition to its name. Its "Royal Dutch" style of cocoa uses West Africa–sourced beans that are more darkly alkalized than many other styles, giving it a gorgeously dark color and earthy flavor.
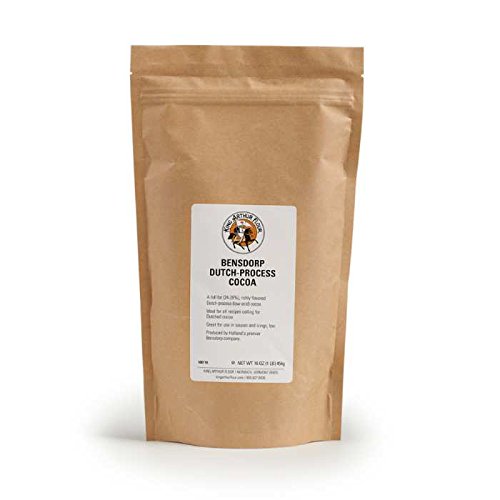
This cocoa also has an especially fine grind, which lends a glossy sheen in brownies and good solubility in applications like hot cocoa.

Droste

Droste Cocoa
At 20% fat, Droste is a little leaner than some of the other Dutch cocoa powders here, but it was a sleeper hit in our blind tasting. Though it's not fancy, there's nothing to complain about in its earthy chocolate flavor. Because it's relatively easy to find in supermarkets and semi-fancy groceries alike, Droste is one of my preferred choices when I'm between shipments on brands that require a special order online, so I was pleased to see it perform so well with our tasters.
Convenience factor aside, buying in bulk online can help drive down the cost per ounce when compared with the retail markup you get in stores.

Valrhona

Valrhona 100% cocoa powder
While you won't see the word "Dutch" on the packaging of this French cocoa, nor any mention of alkalization, we've been assured by representatives from Valrhona that its cocoa is indeed alkalized. It's a cocoa powder favored by professionals, with a bold flavor owing to the company's high standards in sourcing and manufacture—and it's got a price tag to match.
When bought in half-pound containers, Valrhona is nearly $2 an ounce. If you're serious about your cocoa powder, my recommendation is to spend more up front to buy in bulk and either split the order with a few baking buddies or sit back and know you’ll be well stocked for years. This will drive the cost down to just 65 cents an ounce, a tremendous value for such a high-end cocoa. It made a rich, dark, and glossy brownie that was Vicky's top pick.
Ultimately, deciding on the "best" cocoa is a rather personal endeavor, but trying different styles and brands is the best way to better understand your own preferences and baking style. If nothing else, these cocoas offer a chance to explore your favorite recipes in a new light, to see how one ingredient can impact the flavor overall.

Master Blind-Baked Pie Crust With These 6 Simple Tips

source: https://www.seriouseats.com/2016/10/how-to-blind-bake-a-pie-crust.html?fbclid=IwAR1wUkvaT36zLwITRXZms6ZosjcVO2KvpuDsJrMFHvh2jyRfDboM1NnF0RU

Master Blind-Baked Pie Crust With These 6 Simple Tips

Blind-baking isn't difficult at all, but it does require the right technique.
How to Blind-Bake a Pie Crust
Serious Eats

VIDEOS

WATCH MORE VIDEOSREPLAY
[Photographs and video: Vicky Wasik]
If you've never blind-baked a crust, the term itself is a little confusing, but it's just another way of describing a prebaked crust. It's a technique that's primarily reserved for meringue and custard pies that don't bake long or hot enough to develop a crisp and golden crust, but it can also help improve color and crunch in some types of open-faced pie, especially those with a crumb or streusel topping.
The process of blind-baking is easy enough, yet misinformation abounds, turning what should be a beautiful pie crust into a warped and greasy mess. It's not that I've got a problem with ugly pie; it's that these imperfections stem from butter melting in less-than-optimal ways, preventing the dough from reaching its crisp and flaky best. On top of that, shrinkage means a pie shell won't hold as much filling as it should, increasing the rate at which the remaining filling will bake, leading to cracked and curdled custard pies.
Such problems don't have to be par for the course, and are easy to avoid when you know how to handle the dough.

Tip 1: Start With the Right Recipe

Pie doughs that pull every trick in the book to avoid gluten development lack the strength to hold themselves upright in the oven. That makes blind-baking an uphill battle, as the dough is much more likely to slump out of shape. The right sort of gluten development is nothing to be afraid of, especially as it helps a pie stand tall in the oven.* My Old-Fashioned Pie Dough has enough gluten development to keep it upright during a blind bake.
* More on my pro-gluten theory of pie here.

Tip 2: Choose the Right Pie Plate

Heavy ceramic pie plates conduct heat too slowly, inevitably resulting in a crust that's less flaky and crisp than it should be. Instead of creating flaky layers, the butter seeps out into a pale and mealy crust.
Three photos showing greasy crust cooked in ceramic plate.
A ceramic pie plate leads to shrunken, greasy crust.
It's not something you can avoid just by cranking up the heat to blind-bake at a higher temperature, because protecting stuff from heat is what ceramic does best (hence our penchant for ceramic potholders). The absolute best option for blind-baking is a tempered-glass or aluminum pie plate.
Three photos showing crust cooked in glass plate.
Aluminum or tempered glass will keep your crust crisp and shapely.
Sure, these humble pie plates may not be as stunning as lacquered ceramic, but they conduct heat quickly so the butter melts at just the right rate, producing a crust that's flaky and crisp. (You can read a more in-depth look at those options here.)

Tip 3: Roll, Shape, Then Chill the Dough

Before you blind-bake, it's essential to start with a cold pie shell. Not simply because the gluten in the dough needs a chance to relax, but also so the butter will melt at the proper rate. Done right, blind-baking allows the water in the butter to escape and puff between the layers even before the gluten matrix sets the dough's shape. If not properly chilled, the butter will ooze out of place without actually puffing the layers, creating a mealy texture in the dough.
To keep things nice and cold, many recipes start with a lump of dough that's been refrigerated an hour or two before rolling, shaping, and blind-baking. Problem is, that nicely chilled and relaxed dough gets warmed up and stressed out during rolling and shaping, encouraging it to shrink and shrivel in the oven unless it's given another chance to chillax.
Formed and uncooked pie dough in plate.
To save time, I prefer to make, roll, and shape the dough all in one go. That's a snap so long as the dough temperature stays between 65 and 70°F (18 and 21°C), the range you'll automatically nail when "room temperature" is at or below 73°F (23°C). In warmer conditions, you'll want to take a few proactive steps to manage your dough temperature.
After shaping the decorative border, refrigerate the pie dough for at least two hours before blind-baking to ensure it's perfectly cold and relaxed.

Tip 4: Bake Low and Slow

Most recipes will have you blind-bake in two stages, starting the pie dough with weights and liners in a super-hot oven (between 400 and 425°F/200 and 220°C). Once the dough is lightly browned, after 15 to 20 minutes, the crust comes out of the oven, the weights are removed, the dough is docked, then it's put back in the oven and baked 15 to 20 minutes more.
Not only does this feel remarkably like doing the hokey pokey ("You put your pie crust in, you take your pie crust out, then you grab a fork and you poke it all about"), the results aren't that great. High heat encourages the pie dough to shrink and puff, reducing its capacity for filling, distorting the decorative border, and creating air pockets all over the bottom and sides of the crust.
I vastly prefer blind-baking for an hour at 350°F (180°C), with pie weights in place the entire time. First of all, it takes zero effort on my part—I stick the dough in the oven, then pull it out when it's done. But second, blind-baking at a more moderate heat reduces shrinkage and puffing, for a golden-brown crust that's perfectly flat along the bottom and sides.
As it turns out, I'm not alone. Chefs like Nancy Silverton and Wolfgang Puck have been advocating the low-and-slow approach since the mid-'80s. Ultimately, it doesn't take much longer than a high-heat approach, but the effort-to-reward ratio is unparalleled and the results even more golden and crisp.

Tip 5: Aluminum Above and Below

Most blind-baking techniques call for the pie to be lined with parchment, but it's not the best option. For starters, it absorbs butter, so your pie weights get dirty every time. Beyond that, it's too rigid to conform to the curves of the pie plate, making it easy for air bubbles to deform the bottom and sides.
I love aluminum because it keeps my pie weights clean and hugs every curve of the dough. It can even be folded over to shield the edges of the crust from excessive browning; no "pie shield" required. Per tip #3, it's essential that the pie shell be thoroughly chilled before you add the aluminum liner, as it may stick to a softer dough and/or deform its shape.
Uncooked pie dough covered in aluminum.
I also recommend placing the pie on an aluminum baking sheet to prevent smashing the decorative border with a wayward oven mitt on your way in or out of the oven. Aluminum baking sheets also conduct heat along the bottom of the pie plate, helping the bottom crust to brown.

Tip 6: Forget Weights, Use Sugar

My kitchen and budget are too tight to accommodate a bag of ceramic pie weights or marbles, and I'd rather save rice and beans for dinner. It's not that weights aren't essential, only that my go-to choice is far less traditional: plain white sugar. For one thing, it's something that any baker has in abundance, and, at seven ounces per cup, it's wonderfully heavy. It's also more granular than any other option.
Four images showing process of filling pie with sugar.
That lets sugar settle into every nook and cranny of the aluminum-lined crust, distributing its considerable weight across the bottom and sides of the pan, and butting up against the taller edges, too. As a pie weight, sugar completely eliminates the risk of slumping, shrinking, or puffing, and obviates the need for docking. The result? A laissez-faire method that gives me a crust deep and flat enough to hold every last drop of filling. When you're done, simply cool the sugar to room temperature and transfer to an airtight container.
With sugar, you won't waste money on inedible pie weights or janky beans you'll have to throw out someday. After cooling, it can be used just like regular sugar in any recipe, or reserved for a few more rounds of pie duty until it turns pale tan. By that point, the toasted sugar will have enough character to add delicious complexity to traditional meringue, mellow the sweetness of blueberry pie, or round out the flavor of classic banana bread. If the idea of baking sugar freaks you out, read up on the concept here.
Baked pie crust and toasted sugar.
Regardless of whether you choose my pie crust recipe or yours, these techniques will go a long way toward improving the quality of your blind-baked crusts, so you can count on a crispy foundation for all your meringue and custard pies.

Old-Fashioned Flaky Pie Dough Recipe

A buttery, flaky, tender, and easy pie dough recipe that requires no special equipment, ingredients, or training.
How to Make an Old-Fashioned All-Butter Pie Crust
Serious Eats

VIDEOS

WATCH MORE VIDEOSREPLAY
[Photographs: Vicky Wasik. Video: Natalie Holt]
This easy pie dough has a recipe that pastry chefs tend to favor, but it doesn't require any fancy ingredients, equipment, or training. Just smash some cold butter in a bowl of flour, stir in a bit of water, roll it out, and fold it over a few times. It's essentially a streamlined blitz, making an easy, layered dough that's supple but strong. That means it won't slump out of shape in the oven, so it can support all types of complicated decorative techniques, but it's wonderfully buttery, so it always turns out flaky and tender, too.
The dough can be made ahead of time and refrigerate for up to 24 hours before use. To store it for longer than that, the dough can be frozen as a block, rolled, or shaped in a pan. If frozen as a block, dough will need to rest/relax for at least 2 hours before rolling and shaping.
In summer months, warm pantry staples and equipment will raise the temperature of pie dough, causing the butter to melt. If it's warmer than 73°F (23°C) in your kitchen, a few simple precautions will keep your dough happy and cool; more here.

Why It Works

  • All-purpose flour gives the dough strength to hold its shape in the oven, preserving any sort of decorative design.
  • A blitz-style ratio of flour to butter creates a dough that's pliable but strong, making cracks and tears a thing of the past.
  • One round of folding provides eight major layers with minimal fuss.
  • Refrigerating the dough after shaping ensures it's fully chilled and relaxed, preserving its flakes in the oven.
  • YIELD:Makes 2 single- or 1 double-crusted 9-inch pie (regular or deep-dish)
  • ACTIVE TIME:25 minutes
  • TOTAL TIME:2 1/2 hours
  • RATED:    

Ingredients

  • 8 ounces all-purpose flour (1 2/3 cups; 225g), plus more for dusting
  • 1/2 ounce sugar (1 tablespoon; 15g)
  • 1 teaspoon (4g) Diamond Crystal kosher salt; for table salt, use half as much by volume or use the same weight
  • 8 ounces unsalted butter (2 sticks; 225g), cold
  • 4 ounces cold tap water (1/2 cup; 115g)

Directions

  1. 1.
    For the Dough: Whisk flour, sugar, and salt together in a medium bowl. Cut butter into 1/2-inch cubes (this size is important, as smaller pieces will melt too fast) and toss with flour mixture to break up the pieces. With your fingertips, smash each cube flat—that's it! No rubbing or cutting. Stir in water, then knead dough against the sides of the bowl until it comes together in a shaggy ball. Dough temperature should register between 65 and 70°F (18 and 21°C); if not, refrigerate briefly before rolling and folding (see note).
  2. 2.
    Make the Layers: On a generously floured work surface, roll dough into a roughly 10- by 15-inch rectangle. Fold the 10-inch sides to the center, then close the newly formed packet like a book. Fold in half once more, bringing the short sides together to create a thick block. Divide in half with a sharp knife or bench scraper. Dough temperature should still be somewhere between 65 and 70°F (18 and 21°C); if not, refrigerate briefly before proceeding (see note).
  3. 3.
    For Single-Crusted Pies: Using as much flour as needed, roll one piece into a 14-inch circle and drape across a 9-inch pie plate; it will be super easy to lift by hand. Dust off excess flour with a pastry brush, using it to nestle dough into the very corners of the pan. With scissors or kitchen shears, trim the edge so that it overhangs by 1 1/4 inches all around. Fold overhang over itself to create a thick border that sits atop the rim of the pan. Crimp or shape crust as desired. Repeat with remaining dough. Wrap with plastic and refrigerate at least 2 hours and up to overnight. Use as directed in your favorite recipe.
  4. 4.
    For a Double-Crusted Pie: Using as much flour as needed, roll one piece into a 14-inch circle and drape across a 9-inch pie plate; it will be super easy to lift by hand. Dust off excess flour with a pastry brush, using it to nestle dough into the very corners of the pan. With scissors or kitchen shears, trim the edge so that it overhangs by 1 inch all around. For a solid top crust, roll remaining dough as before, or roll into a 9- by 15-inch rectangle for a lattice-top pie. Transfer the entire sheet, uncut, to a baking sheet or parchment-lined cutting board. (The parchment will prevent dough from absorbing any savory odors from the board.) Wrap both portions in plastic and refrigerate at least 2 hours and up to overnight. Use as directed in your favorite recipe.
  5. 5.
    For a Blind-Baked Pie: Adjust oven rack to lower-middle position and preheat to 350°F (180°C). Line chilled pie shell with a large sheet of aluminum foil, pressing so it conforms to the curves of the plate (a second sheet of aluminum may be needed for full coverage). Fill to the brim with sugar, transfer to a half sheet pan, and bake until fully set and golden around the edges, 60 to 75 minutes. Fold long sides of foil toward the middle, gather short sides, and use both hands to carefully transfer sugar to a heat-safe bowl. Let sugar cool to room temperature. If needed, continue baking crust a few minutes more to brown along the bottom. A full explanation of this process can be found here.