The Food Lab: The Secret to Perfectly Imperfect Yakitori (Japanese-Style Grilled Chicken Skewers)
Published: Last Modified:

Japanese-style grilled chicken is as foolproof as it is delicious. [Photographs: J. Kenji López-Alt]
Get the Recipes
Chasing perfect yakitori—Japanese-style grilled skewered chicken—is a lifelong, full-time pursuit for some.
Restaurants in Japan tend to be quite different from those in the States. In the US, most restaurants offer a variety of foods cooked through various methods. You're likely to see grilled foods, sautéed foods, fried foods, boiled foods, steamed foods, et cetera, all on the same menu. In Japan, it's far more common for a restaurant to specialize in one technique. If you're in the mood for tempura, you'd better hope everyone in your party is, because that's all the restaurant is going to serve.
This kind of hyper-specialization leads to a few logical results: The restaurants that specialize in a particular food get really good at it, and, no matter how niche a particular theme is, undoubtedly there will be some kind of innovation involved.
How many different types of grilled chicken can a restaurant serve? Three? Four? Try dozens. And I'm not even talking about jazzing things up with crazy spices or sauces. Most yakitori restaurants will offer only two options for flavoring: salt and white pepper, or a sweet soy-sauce-and-mirin glaze (tare, more generically known in the US as teriyaki sauce). And the cooking technique doesn't vary much, either. Everything served in a yakitori house will inevitably be threaded onto short bamboo skewers and slow-cooked over a specially designed charcoal grill that allows the chef to continuously rotate the meat, keeping it juicy and developing a crust that's perfectly browned, with just the slightest hint of char.
And yet, going to a first-rate yakitori joint in Tokyo is sort of like sidling up to the all-you-can-eat buffet at the Golden Corral: You can be paralyzed by choice. The only difference is that at a yakitori restaurant, you're thinking, "Oh, man, which of these amazing three dozen options do I pick?", and at the Golden Corral, it's more like, "Which of these three dozen options is least likely to make me regret it all in a few hours?"*
* Answers: all of them and none of them, respectively.
You'll find chicken breast, chicken tenderloin, chicken breast cartilage, thighs skewered on their own, each individual section of the wings, chicken-skin skewers, chicken gizzards, and the nubs of crispy fat from the end of the chicken's tail. To give you an idea, I have a Japanese-language book on advanced yakitori techniques from Tokyo's famous TORI+SALON restaurants that runs a full 208 pages. It contains no fewer than 11 different ways to cut and skewer chicken livers and eight different methods for skewering hearts. This is serious, serious business.
It's also, as much Japanese food tends to be, the business of putting in monumentally more effort for fractionally better returns. The fact of the matter is, even without years of specialized training, anyone can make really, really great-tasting yakitori at home. Will it nudge the edge of perfection? Probably not, but it'll be better than anything you get from the pan-Japanese restaurant down the block, serving sushi, tempura, yakitori, and ramen all on the same menu. For my money, the easiest and most forgiving yakitori staple is negima: juicy chicken thigh alternately threaded onto a skewer with sections of scallion. Because thighs are naturally high in connective tissue and fat, they end up juicy even if you don't precisely measure temperature as they cook.
In the TORI+SALON book, there are a total of 18 photographs and steps devoted to showing you how to properly trim and cut a chicken thigh for their negima, followed by another four photographs of correct skewering technique and a further four for instructions on how they grill it.
We're going to find our way to delicious results with, oh, let's say five steps, and one of them is optional!
Step 1: Make the Sauce

You don't need tare to make great yakitori—just a bit of salt and pepper will do fine—but I do like the sweet-savory flavor and gorgeous sheen that it gives grilled foods. My tare is very similar to our teriyaki sauce, with the sole exception of the few aromatic vegetables (scallions, garlic, and ginger) I include in the base of soy sauce, mirin, sake, and sugar. If you happen to have some fat-free chicken scraps lying around, adding a few to the sauce as it reduces to a shiny glaze will further reinforce the chicken flavor.
Step 2: Skewer the Chicken
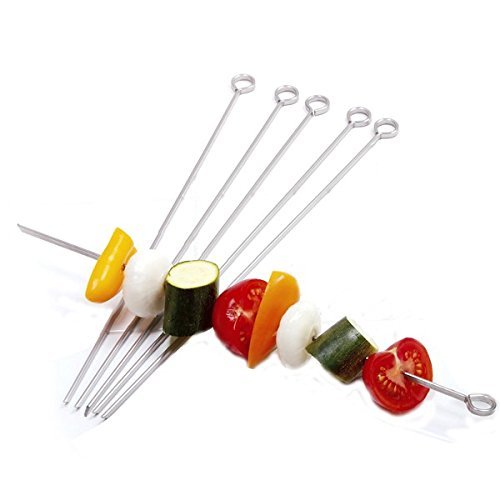
At TORI+SALON, they are extremely careful to separate muscle groups in the chicken thighs, carefully trimming out bits of fat and sinew. For our purposes at home, just cutting the chicken into rough one-inch dice is more than adequate. I toss them with a bit of salt and white pepper, then thread them onto flat metal skewers, alternating a couple of pieces of chicken with one-inch segments of scallion, using just the white and pale green parts.
The real key here is to push everything together so it's nice and snug, which creates less surface area for moisture loss as the chicken cooks, ensuring juicier results.
Step 3: Grill!

Because it's cooked over relatively moderate heat, and because chicken thigh is so forgiving, cooking negima is quite foolproof. All you have to do is set the skewers over a preheated, oiled grill and cook them, turning whenever you feel like it and seasoning the chicken a few times with some more pinches of salt and pepper. (Adding salt as it cooks ensures deep seasoning, while adding pepper in stages helps to develop layers of different types of pepper flavor.) Incidentally, you don't have to use white pepper if you don't like it. Black pepper is fine, as is a pinch of spicy togarashi or whatever other spice suits your palate. In this photo, I'm actually sprinkling on a touch of powdered yuzu salt, made with the skin of a Japanese citrus fruit.
Even though yakitori is traditionally cooked over charcoal embers, the coals are intended to be completely smoke-free. This, coupled with the mild heat, means that the flavor you get from yakitori cooked on a gas flame is not significantly different from that of yakitori cooked on a live charcoal fire. Good news for gas grillers out there!
Step 4: Glaze

As soon as the chicken is nice and golden brown, it's time to brush it with the tare glaze. I use this silicone brush from OXO, which has a layer of perforated flaps that hold extra sauce, making it easy to get even coverage. Once it's been brushed on all sides, you're ready for the final step.
Step 5: Eat and Repeat

This is the easy one. Dig in, brushing with a little more sauce at the table if you'd like. Yakitori is the kind of meal best eaten right as it comes off the fire, or, at the very most, a minute or two later (letting it cool slightly allows any additional sauce to adhere a little better). So don't bother with being polite and waiting until there's a big enough pile of skewers for everyone. Tell your guests to dig in and eat as subsequent batches are cooking.
For the Side
A plate of skewered chicken alone does not a meal make. For a full meal, you'll also require a cold beer. If you want to get extra fancy because important guests are coming over, you should probably also consider grilling a few vegetables, a very common option at most yakitori restaurants, and easy to do if you skewer the vegetables along with the chicken and grill them all at once, trotting them out to the table as they finish cooking.
I tend to go with what's seasonal or looks best at the market. Last month, that meant fat stalks of asparagus and some really young and tender baby bok choy. Now it's shishito peppers and giant king oyster mushrooms.

For the shishitos, I keep things simple, skewering them with two skewers to make them easier to flip. They take only a couple of minutes on each side to brown and tenderize. Mushrooms are often skewered whole and gently grilled, but this time around, I decided to see if I could up the flavor factor by alternately skewering slices of king oyster mushroom with slices of bacon, stacking the slices of mushroom on the skewers so that they end up reassembling themselves.

The experiment was a smashing success. As the bacon crisps up, it renders its juices, which are subsequently absorbed into the juice-hungry mushrooms. With a little extra glaze, these mushrooms were the hit of a recent grilled-things-on-a-stick party I hosted.
One of these days, I'm going to actually work through all 26 of those steps in that book and take one tiny step closer to yakitori perfection. But until then, I'll satisfy myself with the not-quite-perfect-but-pretty-darn-good version I've got going already. Won't you join me?