Crunchy cucumbers and creamy avocados are the stars of this simple five-ingredient salad. Peeling the cucumbers in alternating stripes helps them soak up seasonings while maintaining their shape. After being cut into bite-size pieces, they are combined with salt to draw out moisture, concentrating their flavor. Cubed avocado is tossed with lemon juice or vinegar to prevent browning, then everything is stirred together vigorously so that the avocado breaks down a bit to add a glossy coating. Finish with a hit of red-pepper flakes for heat, or embellish with herbs, lettuces, beans, soft-boiled eggs, feta, nuts and so on.
INGREDIENTS
Yield:4 servings
2scallions, trimmed then sliced crosswise ¼-inch-thick
Ice
1pound cucumbers (such as 6 Persian or mini seedless, or 1 English)
Kosher salt
2very ripe avocados
2tablespoons fresh lemon or lime juice, or unseasoned rice vinegar, plus more as needed
Red-pepper flakes or hot sauce, for serving
PREPARATION
Step 1
Transfer the scallions to a small bowl of ice water to crisp.
Step 2
Peel the cucumbers in alternating strips and trim ends. If desired, halve lengthwise and scoop out the seeds. Cut cucumbers into bite-size pieces (thin slices, ½-inch cubes, or smashed into irregular shapes), then transfer to a colander set in the sink. Toss with 1 teaspoon salt and set aside to drain, at least 5 minutes or up to 15.
Step 3
When you’re ready to eat, halve the avocados and remove the pits. Using a spoon, remove the flesh from the skins, then cut the flesh into ½-inch cubes. Transfer to a large bowl, add the lemon juice and season with salt. Stir to combine.
Step 4
Shake the cucumbers in the colander to get rid of any excess moisture, then transfer to the bowl with the avocado. Drain and shake the scallions in the colander. Add the scallions to the bowl.
Step 5
Stir the salad ingredients vigorously just until the avocado breaks down a bit. The cucumbers should be glossed with avocado but the majority of the avocado pieces should still remain cubed. Season to taste with salt, lemon and red-pepper flakes or hot sauce.
O să încep prin a mă plânge despre cât de dificil este să faci o fotografie unui sorbet, atunci când în atmosferă sunt efectiv 40 °C… uaaaauaaa (așa plâng io fără emoticoane). Cred că acele fotografii făcute de profesioniști sunt ori făcute la Polul Nord, ori au folosit ceva magie. Acum că am scos treaba asta din sistem, haideți să vedem puțină teorie, din aia lungăăăăăăă, faină sau plictisitoare. Depinde de atitudinea voastră!
Ce este sorbetul?
Păi ce să fie? Nectarul zeilor, atunci când Terra decide să devină Iad. În comparație cu granita, Domnul sorbet, este mai cremos, mult mai stabil ca formă fizică șiiiiiii se face folosind ca bază un sirop, care conține agenți de îngroșare, fibre și… etc. O să vedem mai pe larg, oleacă mai jos. Amu’ să vedem care este definiția sorbetului. Vreau doar să vă amintesc că tot ce înșir eu aici, despre lumea înghețatei, este varianta italiană, cea mai sfântă dintre variante (cel puțin pentru mine). De asemenea, aceste informații sunt prețioase pentru că sunt informații profesionale, care pot fi folosite în cadrul unui laborator de gelato. Mă gândesc că pare cam complicată treaba, pentru a pune în practică aceste rețete, acasă, dar nu este deloc complicat. Singura provocare, cred eu, ar fi găsirea unor ingrediente. Dar o să vă anunț, pe care le puteți omite, dacă faceți rețeta doar pentru voi și nu pentru a fi vândută pe un con de înghețată.
Sorbetul este o soluție pe bază de apă, zaharuri, fructe sau alte ingrediente caracterizante. Sună simplu, nu? Acu’ hai să complicăm situația. muahahhaha
Reguli pentru un sorbet de vis!
Un refractometru!
Trebuie să avem un refractometru, pentru a măsura % de zahăr. Știți voi ce este un refractometru, pentru că am scris eu, aici.
Limita maximă de % zahăr este de 30%, iar limita minimă este de 26%. Dacă mergem peste 30%, sorbetul nostru nu devine solid, atunci când îl băgăm la temperaturi negative, pentru că un % mare de zahăr nu permite congelarea. Dacă punem zahăr sub 26%, se vor forma cristale mari de gheață, și vom obține mai degrabă o granita, decât un sorbet.
Un sirop!
Acest sirop, nu este alcătuit doar din apă și zahăr tos. Acest sirop poate conține: zaharoză, dextroză, fibre, agenți de îngroșare, sirop de glucoză etc. Vă întrebați de ce? Păi, pentru că leagă mai bine moleculele de apă, fără să formeze cristale mari de gheață, oferind un sorbet cremos. Putem face un sorbet și fără fibre, agenti de îngroșare, etc? Da, dar va fi o altă consistență!
Siropul se pregătește pe foc, apoi se răcește complet, înainte de a-l folosi. Se poate conserva în frigider, pentru câteva zile.
Ingrediente caracterizante!
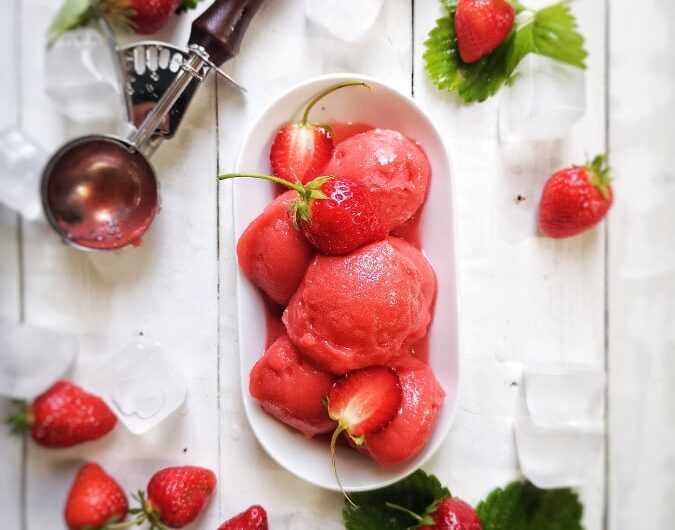
Oare ce’or mai fi și astea? Sunt precum aromele ( vanilie, coajă de lămâie, tonka, etc), dar în cantități mai mari. Ca să înțelegem mai bine… pentru a face un sorbet cu căpșuni, vom avea nevoie de o bază (în acest caz siropul) + căpșuni. Căpșuna, în acest caz , este un ingredient caracterizant, care dă gust, miros, culoare. Astfel, noi înțelegem că sorbetul este făcut cu capșuni. Dar în loc de căpșuni, putem folosi și alte fructe, cum ar fi : lămâie, zmeură, mure, cireșe etc. În acest caz, fructele sunt ingrediente caracterizante.
Fructe , proaspete sau congelate?
Ambele! Ce răspuns simplu, nu? Dacă mă cunoașteți câtuși de puțin, veți ști că nu mă voi opri aici! muahahah
Da, ar fi mirific să folosim doar fructe super coapte, culese de la noi din grădină, care au fost crescute pe sistem bio, etc, dar e puțin mai dificil, mai ales dacă te apucă poftele în toiul iernii. Clar, fructele din situația de mai sus, ar avea o altă aromă, dar va trebui să folosim MUSAI refractometru, pentru că nu avem altă cale de măsurare a zahărului. Iar fructele proaspete, nu sunt chiar toate coapte la fel. Acest principiu este valabil și pentru fructele întregi, congelate. FOLOSIM REFRACTOMETRU.
Dar, dacă folosim piureul de fructe congelate, cam nu ne trebuie refractometrul, decât o dată, atunci când ne calculăm rețeta. De ce? Pentru că piureurile de fructe, suferă o rafinare, care prevede și măsurarea zahărului. Dacă fructele nu conțin suficient zahăr, industria mai pune puțin zahăr, pentru a păstra valorile nutriționale identice între un lot și altul.
P.S. Pentru sorbet, fructele se folosesc ÎNTOTDEAUNA CRUDE. Nu le pasteurizăm, pentru că nu vrem gust de dulceață, ci gust de fructe proaspete. Doar siropul se pasteurizează, apoi se folosește rece ca gheața! aproape ca gheața!
Chestii mici, dar importante!
Mi se pare tare potrivit acest subtitlu, doar pentru că urmează să discutăm despre niște substanțe, care se folosesc în cantități minuscule, dar care sunt esențiale pentru a obține acel sorbet italian, pe care l-ai mâncat în ultima ta vacanță, în Italia.
Hidrocoloizi sunt niște substanțe polimerice, care includ polizaharide și ceva proteine. Sună pompos, dar nu e. Ca să înțelegem mai bine ce sunt acești hidrocoloisi, haideți să o întrebăm pe Doamna Limbă Greacă ce înseamnă: hidro=apă și kolla=lipici. Adică, sunt niște molecule care leagă apa. Exemple de hidrocoloizi:
făina de semințe de roșcove;
făină de semințe de guar;
caragenan;
gumă xantan;
agar agar;
pectina Hm.
Unii hidrocoloizi se activează la rece, iar alții la cald (agar agar, pectina, etc), de asta este necesar să încălzim siropul, înainte de a-l folosi la sorbet ( dar îl vom folosi mereu rece).
Fibrele alimentare
Fibrele alimentare sunt carbohidrații de origine vegtală, care nu sunt asimilate de organismul nostru, adică cum intră așa ies. Ele au o super putere și anume puterea de a absorbi apa liberă. Din acest motiv, se folosesc la sorbeturi, pentru că oferă cremozitate, fără a adăuga alte ingrediente, cum ar fi grăsimi. Cea mai folosită fibră vegetală, este INULINA.
Acu’ sper că nu v-am speriat cu acest nume. Poate nu cunoaștem termenul, dar inulina se găsește cam peste tot și o ingerăm mai des decât ne imaginăm. Aceasta se găsește în ceapă, praz, grâu, anghinare, cicoare și în alte milioane de legume. Se folosește de foarte multă vreme în industria alimentară, ca înlocuitor de grăsime din tabletele de ciocolată. Pe noi ne interesează de ce se folosește în înghețată. Inulina permite micșorarea cantitații de zahăr din sorbet, oferă o consitență mai fină și mai puțin rece la gust. Cum să nu iubim inulina??????
Albușul de ou!
Cred că, aproape toți cunoaștem varianta de sorbet cu albuș de ou! Cândva și încă acum, se adaugă albuș crud la sorbet, pentru a-l stabiliza, pentru a mări volumul și pentru a oferi cremozitate. Dar, acum, în laboratoarele de gelaterie nu se prea folosește, pentru că există risc mare bacterian și alți o mie de înlocuitori pentru albuș. Dacă, totuși dorim să adăugăm albuș, măcar să îl folosim pasteurizat.
Există alte o mie de ingrediente care se folosesc în lumea înghețatei, dar nu le voi dezvolta aici, pentru că nu ne dăm masteratul în gelato. În plus, v-ați plictisi de ați cere închiderea acestui blog :)).
Sorbetul italian : manual de instrucțiuni+ rețetă cu căpșuni
Recipe by Mocanu Ramona Mihaela
Întâi voi scrie rețeta siropului, care va fi baza cam pentru orice sorbet vom face.
INGREDIENTE SIROP
500 grame apă;
400 grame zahăr tos;
75 grame dextroză;
20 grame inulina;
5 grame făină de semințe de roșcove.
Ingrediente sorbet căpșuni
500 grame sirop;
500 grame căppșuni curățate.
MOD DE PREPARARE SIROP
Punem toate ingredientele, într-o crăticioară, pe care o vom pune pe foc. Vom amesteca continuu, până ajungem la 85 °C.
Blenduim foarte bine siropul, apoi îl vom transfera într-un alt recipient, pentru a se răci mai repede. Dăm la frigider.
Cel mai indicat este să îl pregătim de seara, pentru a-l folosi a doua zi. Vom observa, că atunci când siropul va fi rece, consitența lui nu va mai fi lichidă ci va deveni puțin mai vâscos. Vâscos, în acest context, este foarte bun. Inulina și făina de semințe de roșcove sunt resposabile de această îngroșare. Deci, nu le omiteți!
Sorbet de căpșuni
În cana unui blender, punem siropul și căpșunile. Blenduim pentru circa 2 minute.
Măsurăm zahărul cu ajutorul refractometrului. Dacă este peste 30%, mai adăuăm apă. Dacă este sub 26%, mai adăugăm zahăr. blenduim.
Dacă avem concentrația corectă de zahăr, trecem sorbetul printr-o sită pentru a elimina semințele. Apoi îl punem în mașina pentru înghețată. Dacă nu avem mașină pentru înghețată, îl punem în congelator și îl amestecăm din când în când.
Sorbetul, în mod normal se servește la o temperatură de -10°C, pentru a avea o textură cremoasă. Pentru că, al nostru congelator are circa -18° C, când vom scoate sorbetul din el, va fi bocnă. Dacă, lăsăm sorbetul la temperatura camerei, acesta va începe să se topească de la exterior către interior și vom avea doar 2 consistențe: fleașcă și țapăn! Ce putem face pentru a avea un sorbet cremos uniform? Îl tăiem bucăți și îl băgăm la blender. Din gheață se va transforma în ceva divin. Să nu mă credeți pe cuvânt. ÎNCERCAȚI!!!!
Amu’ vă zic, poftă bună!!!! Șiiiiii, dacă vă place acest articol, simțiți-vă liberi să ne oferiți o cafea virtuală, apăsând aici! Thank you! Ne vedem pe grupul de facebook, mai puțin vara, mai mult iarna!
p.s. Această rețetă funcționează cu aproape orice fruct, mai puțin cu sucul de lămâie. Să aveți spor la experimentat.
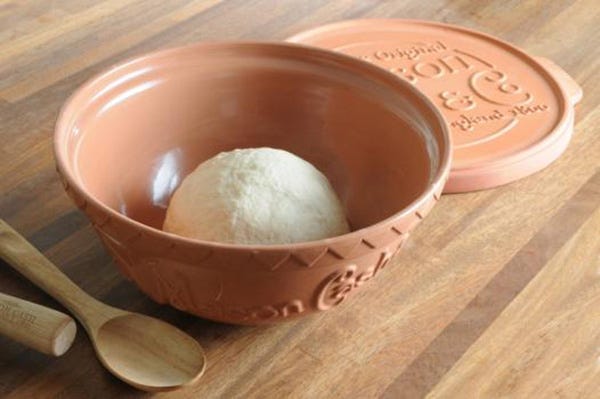
Now that yourdough has been mixed it’s time to prove your bread. First, you need to find a container in which your dough can comfortably double in size without billowing over the top. This may well be the mixing bowl you started off with, but give it a quick wipe first and dry with a tea towel.
Step 2 - Flouring Or Oiling The Surface
Now, you can either flour the surface of the dough, or oil it. Oiling is slightly better than flouring, as it makes an airtight coating, which prevents the dough from drying out. It also enables you to oil the container, which makes it easier to turn the dough out later. (Don’t oil the container if you have floured the dough as you will just make oily flour lumps.)
Step 3 - Covering The Dough
Whichever you decide, put the dough into the container and cover it. We find the simplest way is to put the container in a bin liner and tuck the opening underneath. This makes a lovely environment for your dough – a little humidity from the fermentation process and a little extra warmth from the bag (black absorbs and radiates heat). Covering the bowl with cling film would be nearly as good, though a little more wasteful, as you can't reuse it.
Step 4 - The First Rise
Now you need to leave your dough to rise in a warm place. A pleasantly heated kitchen is ideal, but proofing bread in a slightly cold kitchen is still fine – the dough will just take longer to rise. An airing cupboard, with the boiler going, is likely to be too warm. On top of the Aga is too warm. For a really slow overnight rise, you could put the covered dough in the fridge, but you will rarely want to (unless you are making brioche).
Step 5 - Doubling In Size
During this period of rising, the gluten should be stretched by the activity of the yeast to the limit of its elasticity, at which point the dough will have roughly doubled in size. Beyond this, the dough noticeably loses its structure and elasticity; it will start to look flaccid and a bit holey. This is not a disaster, but the dough will be a little weaker for it.
Step 6 - Knocking Back The Dough
Once the dough has risen sufficiently, uncover and tip it out on to a slightly floured work surface. Gently press into the dough with your fingertips and squash it all over until it is roughly the size you started with. A common term for this is ‘knocking back’.
Step 7 - The Second Rise
You can now leave your dough to rise a second time, following the same spinning and shaping process as before, in order to further mature and improve it. You can even repeat the rising and deflating process three, four maybe five times, Each time you’ll notice the dough becoming more satiny and pillow like. You cannot do this indefinitely though. Eventually there will be no sugars left for the yeast to feed on, and you need it to have enough oomph for the final prove before baking.
The process is pretty straightforward. Put the dough in a greased bowl, cover with cling film or a damp tea towel. If your kitchen is warm, you can let the dough rise on your counter. But if your kitchen is cool, place the covered bowl of dough over a pan of warm to hot water and leave it on your counter.
How to tell if bread is proofed?
To check that the dough is proofed and ready to bake, gently press it with your knuckle or finger. If the dough immediately springs back, it needs longer. If it springs back slowly, leaving a small indent, the dough is ready to bake.
How to tell if bread is over proved?
Over proofing occurs when the dough has been proofed for too long and all the air bubbles have burst. If you poke your dough and it doesn't bounce back at all, you've over proofed it.
Can I use my oven as a proving oven?
Yes! In order to proof bread in an oven, a glass baking dish should be placed on the bottom rack and filled with boiling water. The dough should then be stored on the centre or top rack and the door should be closed. The steam and warmth generated by the boiling water will provide the dough in a warm, steamy environment, which is ideal for a successful rise.
1. Se taie rinichi jumătăţi pe lungime. Cu un cuţit îndepărtăm nervurile şi partea albă din interior.
Tăiem rinichi în bucăţi de 2-3 cm. Îi spălăm bine în mai multe ape reci şi îi acoperim cu lapte rece sau otet pentru 1,5 – 2 ore pentru a înlătura mirosul înţepător.
Îi scoatem din lapte sau otet şi îi opărim 2 minute până îşi lasă spuma.
However, it’s naturally gluten-free, so it can serve as a wheat substitute in cooking and baking for people who are on a gluten-free diet.
Tapioca is a dried product and usually sold as white flour, flakes, or pearls.
SUMMARY
Tapioca is starch extracted from a tuber called cassava root. It’s usually sold as flour, flakes, or pearls.
How is it made?
Production varies by location but always involves squeezing starchy liquid out of ground cassava root.
Once the starchy liquid is out, the water is allowed to evaporate. When all the water has evaporated, a fine tapioca powder is left behind.
Next, the powder is processed into the preferred form, such as flakes or pearls.
Pearls are the most common form. They’re often used in bubble tea, puddings, and desserts and as a thickener in cooking.
Because they’re dehydrated, the flakes, sticks, and pearls must be soaked or boiled before consumption. They may double in size and become leathery, swollen, and translucent.
Tapioca flour is often mistaken for cassava flour, which is ground cassava root. However, tapioca is the starchy liquid that’s extracted from ground cassava root.
SUMMARY
Starchy liquid is squeezed out of ground cassava root. The water is allowed to evaporate, leaving behind the tapioca powder, which can then be made into flakes or pearls.
What is it used for?
Tapioca is a grain- and gluten-free product that has many uses:
Gluten- and grain-free bread. Tapioca flour can be used in bread recipes, although it’s often combined with other flours.
Flatbread. It’s often used to make flatbread in developing countries. With different toppings, it may be eaten as breakfast, dinner, or dessert.
Puddings and desserts. Its pearls are used to make puddings, desserts, snacks, or bubble tea.
Thickener. It can be used as a thickener for soups, sauces, and gravies. It’s cheap and has a neutral flavor and great thickening power.
Binding agent. It’s added to burgers, nuggets, and dough to improve texture and moisture content, trapping moisture in a gel-like form and preventing sogginess.
In addition to their use in cooking, the pearls have been used to starch clothing by being boiled with the clothes.
SUMMARY
Tapioca can be used instead of flour in baking and cooking. It’s also often used for making desserts, such as puddings and bubble tea.
0 seconds of 0 secondsVolume 0%
Nutritional value
Tapioca is almost pure starch, so it’s almost entirely made up of carbs.
It contains only minor amounts of protein, fat, and fiber.
Furthermore, it contains minor amounts of other nutrients. Most of them amount to less than 0.1% of the recommended daily amount in one serving (1Trusted Source, 3).
One cup of dry tapioca pearls contains 544 calories (3).
Due to its lack of protein and nutrients, tapioca is nutritionally inferior to most grains and flours (1Trusted Source).
In fact, tapioca can be considered a source of “empty” calories, since it provides energy but almost no essential nutrients.
SUMMARY
Tapioca is almost pure starch and contains only negligible amounts of protein and other nutrients.
Health benefits of tapioca
Tapioca doesn’t have many health benefits, but it is grain- and gluten-free.
In order to manage their symptoms, they need to follow a restricted diet.
Since tapioca is naturally free of grains and gluten, it may be a suitable replacement for wheat- or corn-based products.
For example, it can be used as flour in baking and cooking or as a thickener in soups or sauces.
However, you may want to combine it with other flours, such as almond flour or coconut flour, to increase the amount of nutrients.
What about resistant starch?
Resistant starch has been linked to a number of benefits for overall health. It feeds the friendly bacteria in your gut, thereby reducing inflammation and the number of harmful bacteria (8Trusted Source, 9Trusted Source, 10Trusted Source).
Cassava root is a source of natural resistant starch. However, tapioca, a product obtained from cassava root, has a low content of natural resistant starch, likely because of processing (16, 17).
Research is lacking on the health benefits of chemically modified resistant starches versus natural resistant starches.
In addition, given the low nutrient content, it’s probably a better idea to get resistant starch from other foods instead, such as cooked and cooled potatoes or rice, legumes, and green bananas.
SUMMARY
Tapioca can replace wheat- or corn-based products. It also contains a small amount of resistant starch, which is linked to a number of health benefits.
Negative health effects
When processed properly, tapioca does not seem to have many negative health effects.
Most negative health effects come from consuming poorly processed cassava root.
Furthermore, tapioca may be unsuitable for people with diabetes since it’s almost pure carbs.
Improperly processed cassava products may cause poisoning
Cassava root naturally contains a toxic compound called linamarin. This is converted into hydrogen cyanide in your body and may cause cyanide poisoning.
In fact, there have been konzo epidemics in African countries relying on a diet of insufficiently processed bitter cassava, such as during wars or droughts (21Trusted Source, 22Trusted Source).
However, there are a few ways to remove linamarin during processing and cooking.
Commercially produced tapioca generally doesn’t contain harmful levels of linamarin and is safe to consume.
Cassava allergy
There are not many documented cases of allergic reaction to cassava or tapioca.
However, people who are allergic to latex may experience allergic reactions due to cross-reactivity (23Trusted Source, 24Trusted Source).
That means your body mistakes compounds in cassava for allergens in latex, causing an allergic reaction.
This is also known as the latex-fruit syndrome (25Trusted Source).
SUMMARY
Improperly processed cassava root can cause poisoning, but commercially produced products are safe. Allergic reactions to tapioca are rare.
Fortification for health purposes
Properly processed tapioca is safe to eat and cheap to buy. In fact, it’s a lifesaving staple in several developing countries.
However, people who base a large part of their diet on cassava and tapioca-based products may ultimately lack protein and nutrients (26Trusted Source).